Showing posts with label Embellishments-Ribbon. Show all posts

Tuesday, January 25, 2022

Stamp Your Heart Out - Valentine Event

St. Valentine's Day is upon us again, and I have a "new" technique!  For our event, I'm presenting a card technique and a treat box.  

First, this is called a Stack and Shuffle card.  I'll have a link to a document that explains the technique.  I also learned about it very recently on Pinterest. 

I used coordinating cardstock and just played with the patterns.  On a few, I liked the pattern on the reverse and used it!

Here is the link to the directions.

This is the treat box I'm presenting.  It's exactly the same size as the original Conversation Hearts boxes we had as kids.  (That's what I'm stuffing these with!)

I used the same DSP to cover it, and cut-off scraps to cover the edges along with a little ribbon and some stamped hearts.  Fun, easy, and a very thoughtful trinket for a coworker or class of kids.  You can add a To/From on the back written in a die-cut heart!


Click on any of the products below to purchase materials to make this project.

If you don't currently have a Stampin' Up! Demonstrator, I'd be thrilled to talk with you about furthering your crafting pursuits!

Product List


Thursday, January 20, 2022

January Stamp Club - 2nd Set

As always, we make many cards at Club.  MANY.  I always find a technique or have requests of techniques and sometimes there are just things that must be shared.  

This technique is easy.  Yes, really.

Cut two coordinating pieces of Designer Series Paper to 4" x 5 1/4".   Cut both, paying attention to the pattern from the top left corner to the bottom right on the diagonal.  You'll want to use a trimmer with a metal wire to get your corners cut on a miter.  

Adhere the first piece leaving an equal border along the two sides.  Adhere the second piece right to the edge of the first.  The borders should be of equal width (or pretty close) on the opposite sides.

Add a greeting and a bit of ribbon, and you've got a very pretty card!

This greeting was stamped in Poppy Parade to coordinate with the background paper.
Here you can see the two cards from the two sheets of paper.

The greeting here was stamped in Soft Succulent to coordinate with the greens on the card. 
Since the direction on the yellow piece was specifically directional, I had to cut two piece of the yellow.  That design just looks strange to me when it's upside down.


Click on any of the products below to purchase materials to make this project.

If you don't currently have a Stampin' Up! Demonstrator, I'd be thrilled to talk with you about furthering your crafting pursuits!

Product List

Friday, December 24, 2021

2021 Favorites - Make Your Own DSP

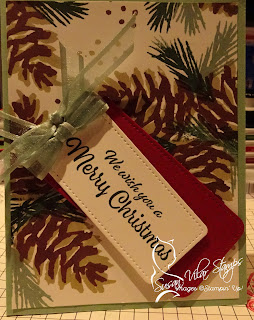
This post is going to be very busy!  I made SO many of these "Make your own DSP" cards.  I still want to make more, but I just have other things that need to get done!

How do you make your own DSP?  You need a stamp set that can make backgrounds.  It should have lots of elements to make a scene or grouping.  Use ink colors that work with your stamps.

For example, for these cards I used:  Crumb Cake and Early Espresso for the pinecones and Evening Evergreen and Soft Succulent for the pine needles.  I used either the browns or some Real Red for the dots.

Read down a little further - there's a special technique.


These two cards were made using the Split Card technique.  Cut your background twice as long as a card base: 10.5 inches.  Draw a very light pencil line vertically at 5 1/4 inches.  Concentrate your stamping to cover the line at the center of the card.  When finished, cut the card at 5 1/4 inches, and you have two cards!

I added a lot of other stamping to fill the space - I just kept going!  


Click on any of the products below to purchase materials to make this project.

If you don't currently have a Stampin' Up! Demonstrator, I'd be thrilled to talk with you about furthering your crafting pursuits!


Product List